2.1 Dashboards Overview
Overview
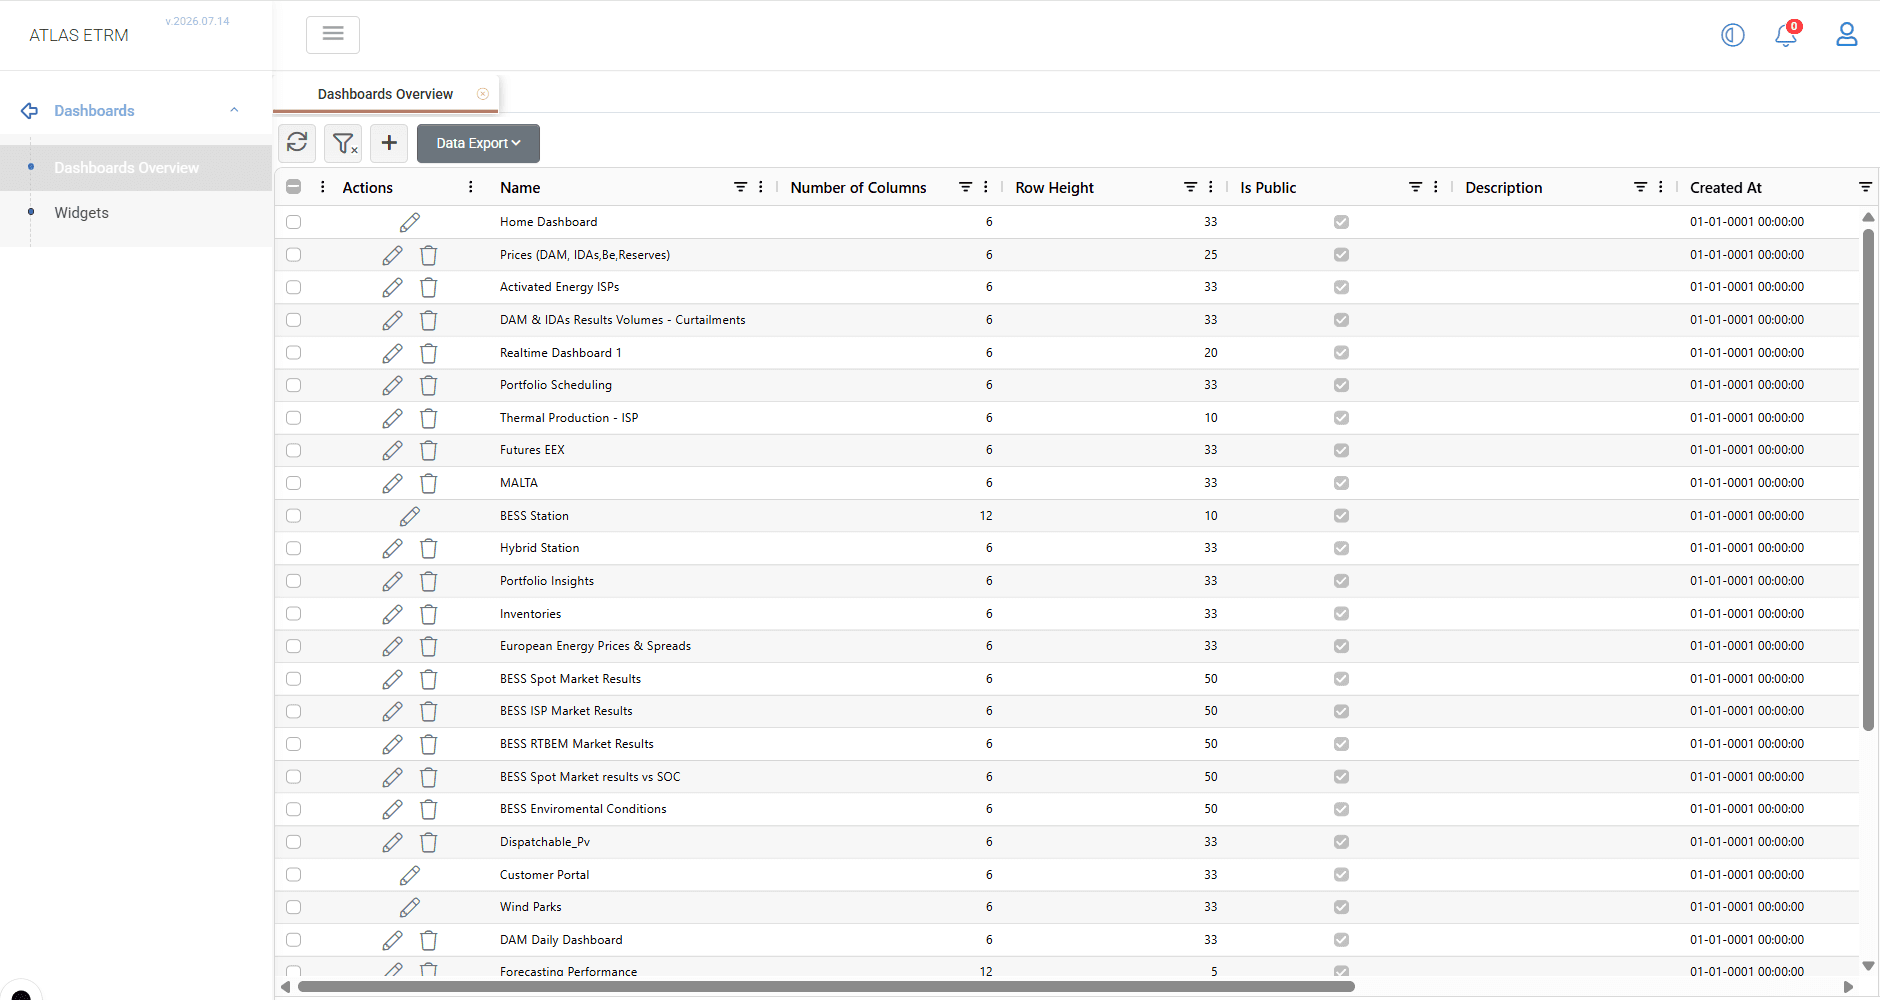
The Dashboards Overview tab provides a centralized workspace for creating and managing dashboards. Users can create new dashboards, edit or delete existing ones, configure dashboard properties, assign dashboards to the ATLAS or module home page, and manage visibility settings according to their business requirements.
Creating a Dashboard
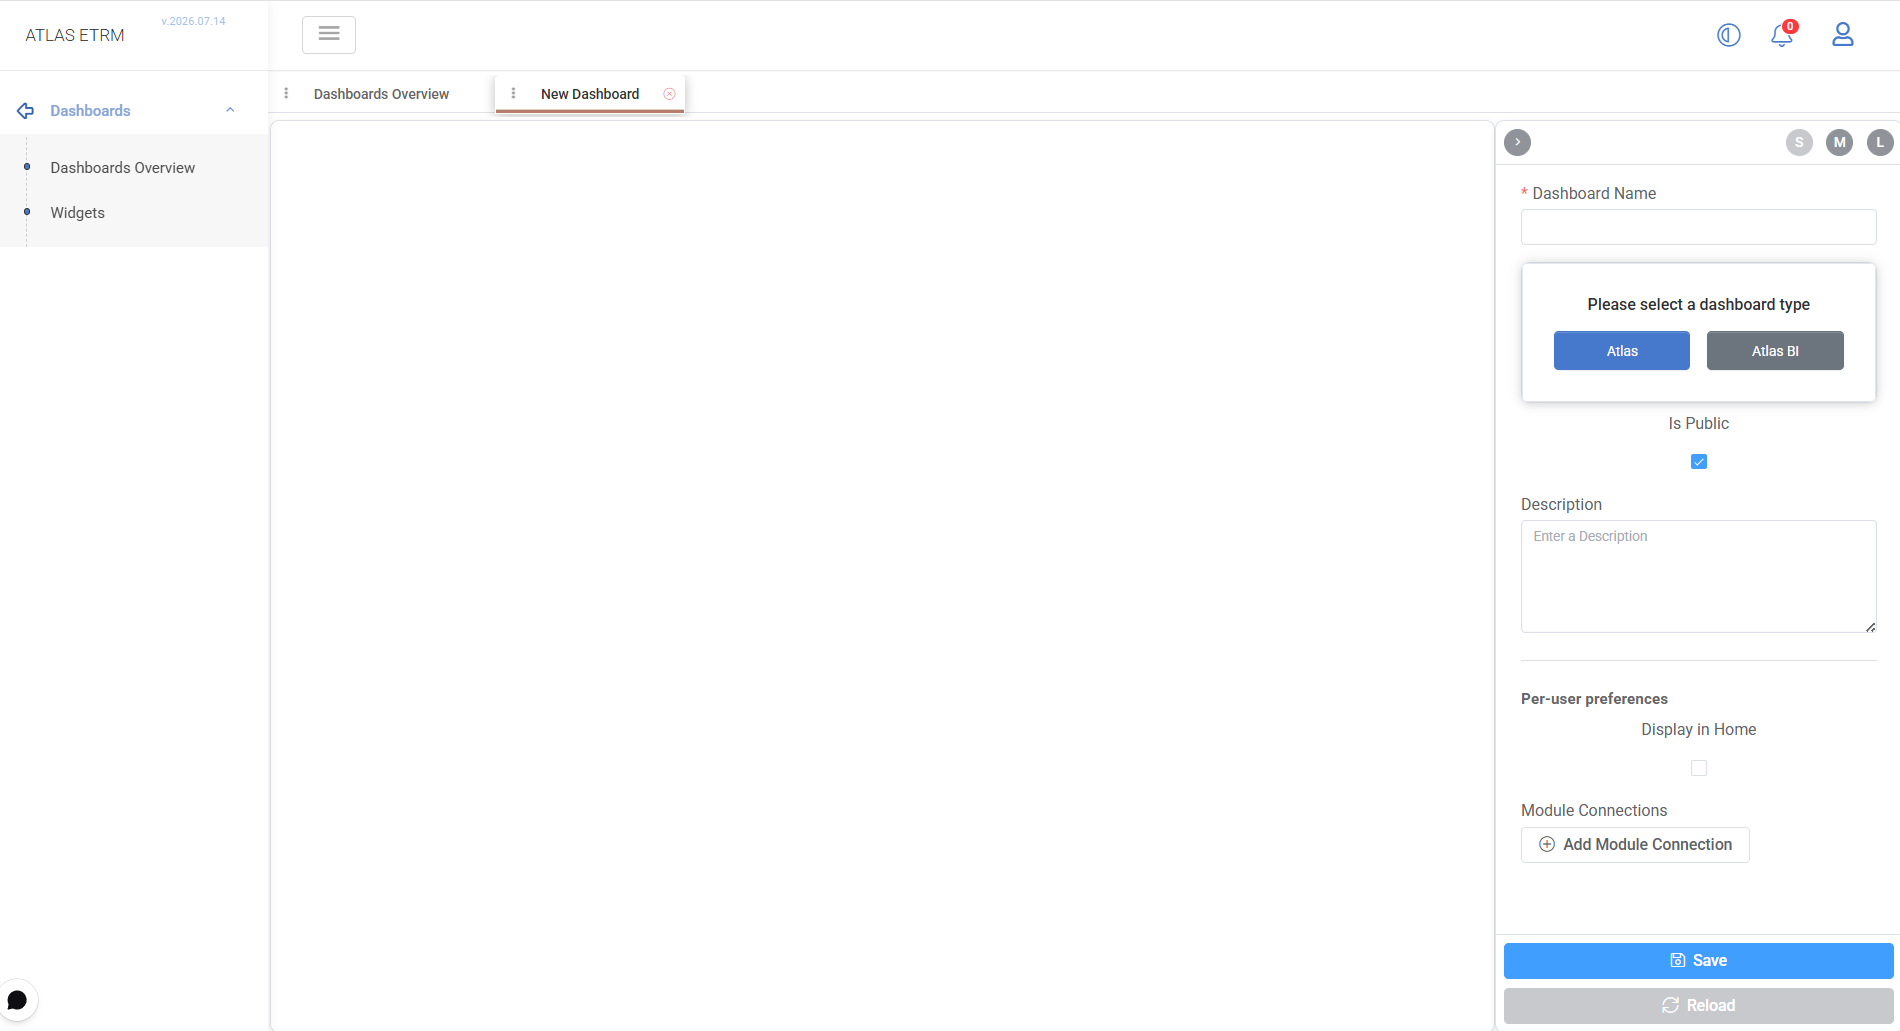
A new dashboard can be created by selecting the + button in the Dashboards tab. Users are prompted to provide the dashboard name and select the dashboard type.
ATLAS supports two types of dashboards:
Atlas – Creates a native ATLAS dashboard that can be populated with ATLAS widgets.
Atlas BI – Imports an existing dashboard from the integrated Business Intelligence tool.
Creating an Atlas Dashboard
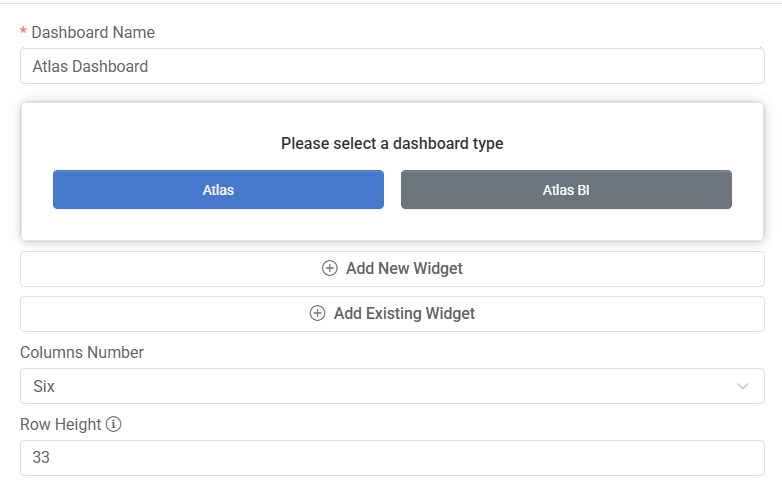
Selecting Atlas creates an empty dashboard that can be populated with new or existing widgets. Users can configure the dashboard layout by defining the number of columns and the row height, which determine how widgets are arranged within the available space.
The dashboard can also be configured as public, making it available to other users, and an optional description can be provided to document its purpose. If required, the dashboard can be displayed on the user's ATLAS home page or associated with one or more modules, allowing it to appear on the corresponding module home pages.
Creating an Atlas BI Dashboard
Selecting Atlas BI allows users to import an existing dashboard from the integrated Business Intelligence tool. Users select one of the dashboards available in the BI repository, after which the dashboard can be configured with the same ATLAS properties, such as visibility, description, homepage preferences, and module connections, before being saved.
Only dashboards that have been published in Metabase are available for import into ATLAS. A published dashboard displays the message "This dashboard is published and ready to be embedded". For instructions on publishing dashboards in Metabase, refer to the Publishing Metabase Content section.
Editing and Deleting Dashboards
Editing Dashboards
Dashboard properties can be modified at any time after creation. A dashboard can be opened for editing by double-clicking it in the grid or by selecting the Edit action (pencil icon) from the Actions menu.
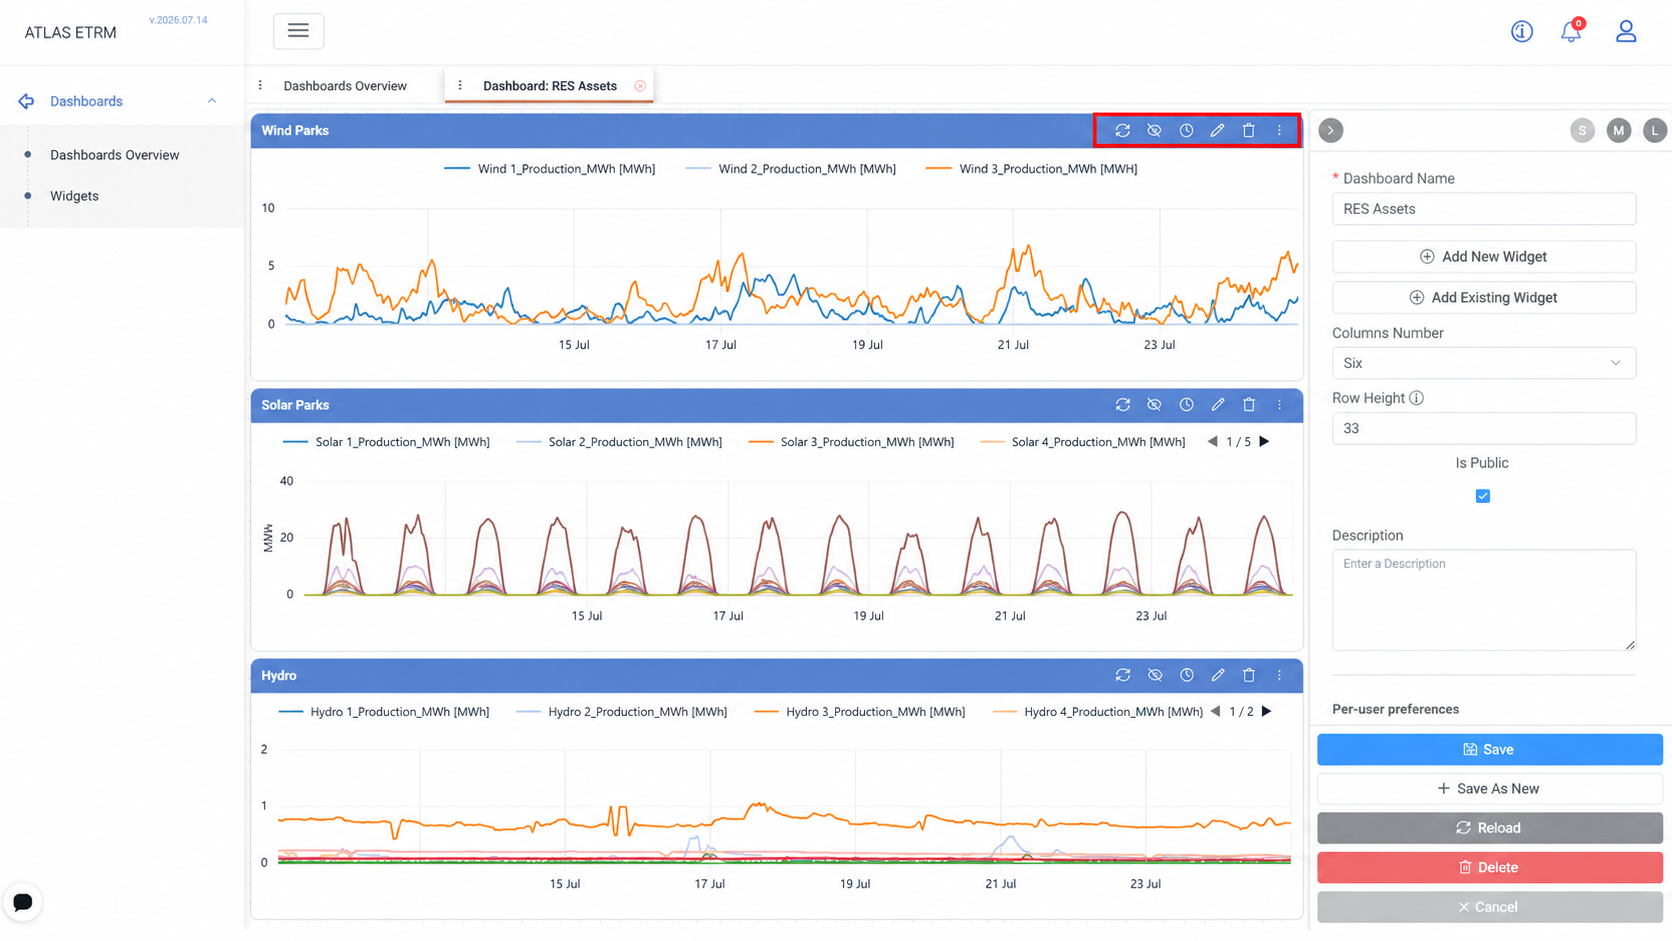
When a dashboard is opened in edit mode, users can update its general properties, add new widgets, include existing widgets, or remove widgets that are no longer required. Widgets can be repositioned by dragging their header and resized using the resize handle in the lower-right corner. The available layout is determined by the configured number of columns and row height defined in the dashboard settings.
Each widget also provides its own toolbar with actions for refreshing the displayed data, hiding or displaying the chart legend, configuring an individual date range, editing the widget, deleting it from the dashboard, and accessing additional options such as exporting the widget to PDF, CSV, or PNG.
After making the required changes, select Save to apply the updated configuration.
Alternatively, select Save As New to create a new dashboard based on the current configuration while preserving the original dashboard unchanged.
Deleting Dashboards
Dashboards that are no longer required can be removed from the system. Deleting a dashboard permanently removes its configuration and layout but does not affect the underlying business data.
A dashboard can be deleted by selecting the Delete action (trash can icon) from the dashboard grid, by right-clicking the dashboard and selecting Delete, or by opening the dashboard in edit mode and selecting Delete. A confirmation message is displayed before the dashboard is permanently removed.
Appendix – Field Details
Dashboard Properties
Field / Element | Required | Description |
|---|---|---|
Dashboard Name | Yes | Unique name used to identify the dashboard throughout the system. |
Dashboard Type | Yes | Determines whether the dashboard is a native ATLAS dashboard or an imported Business Intelligence dashboard. The dashboard type is selected during creation and cannot be changed afterwards. |
Is Public | No | Makes the dashboard available to other users with the appropriate permissions. |
Description | No | Optional description used to document the dashboard's purpose or contents. |
Display in Home | No | Displays the dashboard on the user's ATLAS home page after login. |
Module Connections | No | Defines the ATLAS modules in which the dashboard is available as a module home page. Multiple module connections may be configured. |
Atlas Dashboard Settings
Field / Element | Required | Description |
|---|---|---|
Add New Widget | No | Creates a new widget and adds it to the dashboard. |
Add Existing Widget | No | Adds one or more previously created widgets to the dashboard. |
Columns Number | Yes | Defines the number of grid columns available for arranging widgets within the dashboard. Available options are 1, 2, 3, 4, 6 and 12. |
Row Height | Yes | Defines the height of each dashboard grid row used for widget positioning and resizing. The value must be between 1 and 100. |
Widget Toolbar
Action | Description |
|---|---|
Reload | Reloads the widget and refreshes the displayed data. |
Hide / Show Legend | Toggles the chart legend without modifying the widget configuration. |
Date Range | Opens the widget-specific date range selector, allowing the displayed period to be adjusted independently from the dashboard date range. |
Edit | Opens the selected widget in edit mode. |
Delete | Removes the widget from the current dashboard. |
More | Provides additional actions, including exporting the widget to PDF, CSV, or PNG. |
Was this helpful?