6.1 Scheduling - Bidding Entities
Overview of Scheduling and Bidding Entities

The Scheduling module supports the participation of user in the energy markets (DAM, IDA1, IDA2, IDA3, ISP, XBID) for different assets/portfolios on the production or the consumption side. ETRM is fully compatible with Greek, Cypriot market and other European markets. It also supports any possible cross-border transactions (capacity booking, capacity nominations to the TSO, day-ahead or intraday exercise / energy transfer through the involved power exchanges). Through this module a trader will be able to manage the bids to be submitted in these markets, according to the appropriate granularity, bid attributes and market submission rules.
All types of orders/offers/declarations available in the markets for each type of entity (portfolio/asset) are supported by the Scheduling Module for bidding entities according to market rules.
Bidding Entities
In the menu item “Bidding Entities” the user can declare the bidding entities to the spot market (DAM, IDM, XBID), either being conventional generating units , RES units/portfolios or load units/portfolios for suppliers . This enables users to register and manage all assets/portfolios associated with their relevant company account in market operator platform. Users initially configure their entities during the system setup phase and return to this section to only add, remove, or update entity details whenever changes occur in their participation account they have with the market operator.
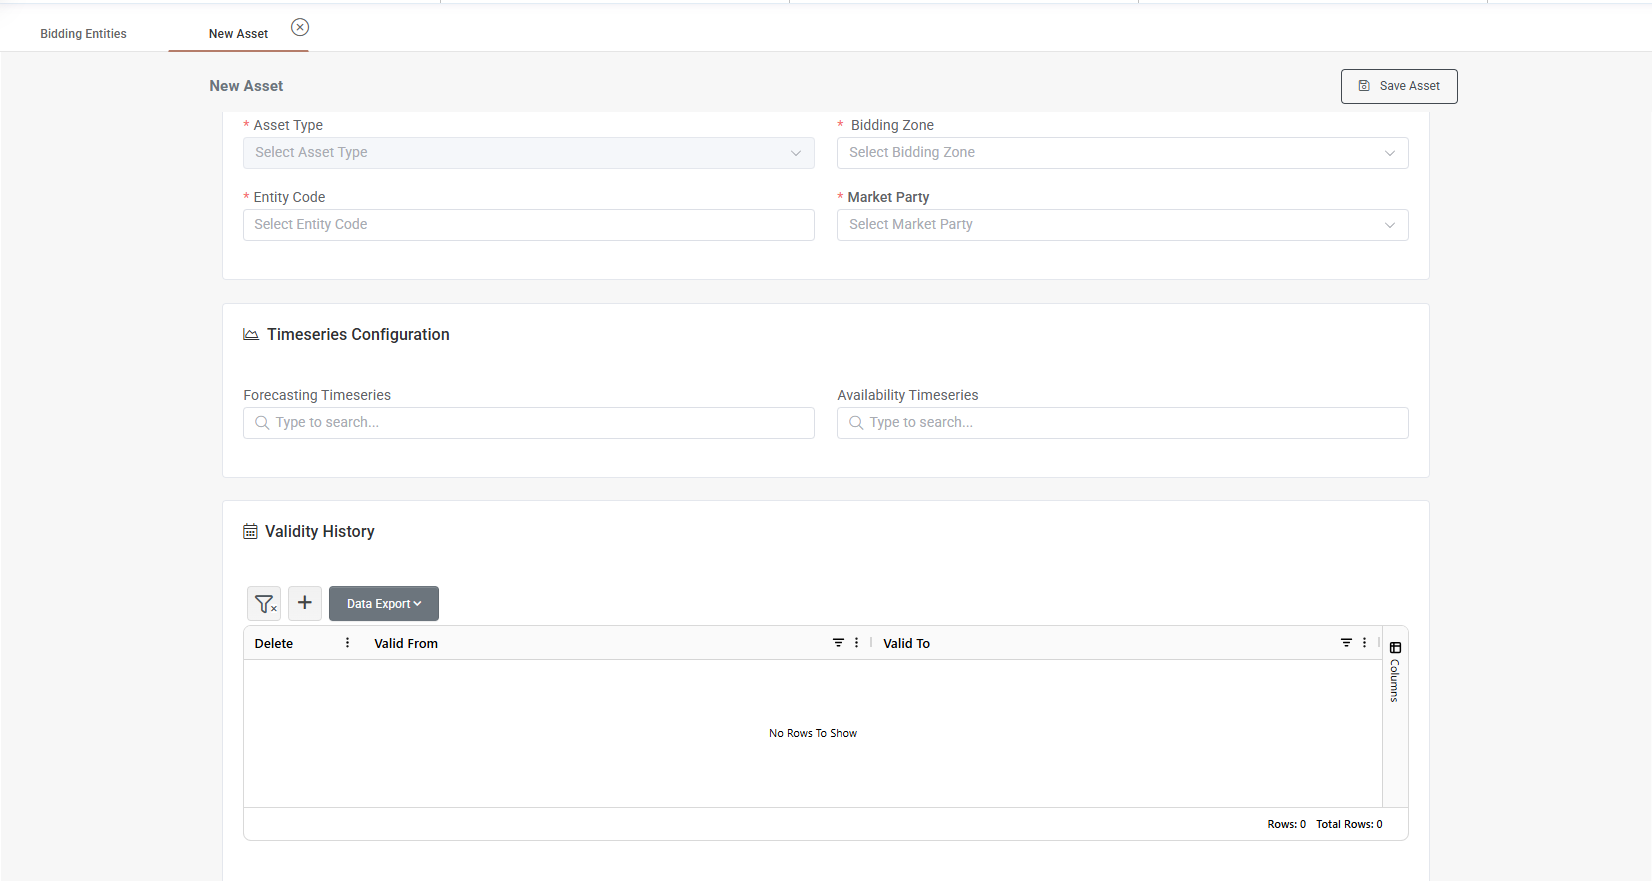
Add new asset
To add a new asset, the user can click the "Add Asset" button on top of screen. This opens a pop-up window where several required fields should be completed:
Asset: A dropdown list containing all available assets within the system.
Asset Type: When an asset is selected automatically the asset type is filled according to asset type. User may modify them from the available predefined categories such as RES Solar, Storage, Load etc.
Entity Code: The EIC code of the specific asset.
Prevailing Direction: Auto-filled based on the selected asset type (sell/buy).
Bidding Zone: Geographic market zone for bidding (e.g. Greece, Cyprus).
Market Party: User selects the market party. Available market parties are listed from companies that have portfolio structure (of course first they should be declared as companies in back office).
Forecasting Timeseries: A smart search field where users can begin typing and select the forecast timeseries relevant to the asset. From this point user can input a forecast from external sources for use in bidding (first the forecasting data series should be declared in data room).
Availability Timeseries: Like the forecasting field; allows linking to the appropriate availability data source.
Note: Only fields with asterisk are mandatory.
In addition, users must define the validity period of the asset entry by clicking "Add Row" and entering the corresponding start and (optionally) end dates. By managing these validity periods, the system maintains a complete historical record of asset validity for traceability and compliance during the market participation.
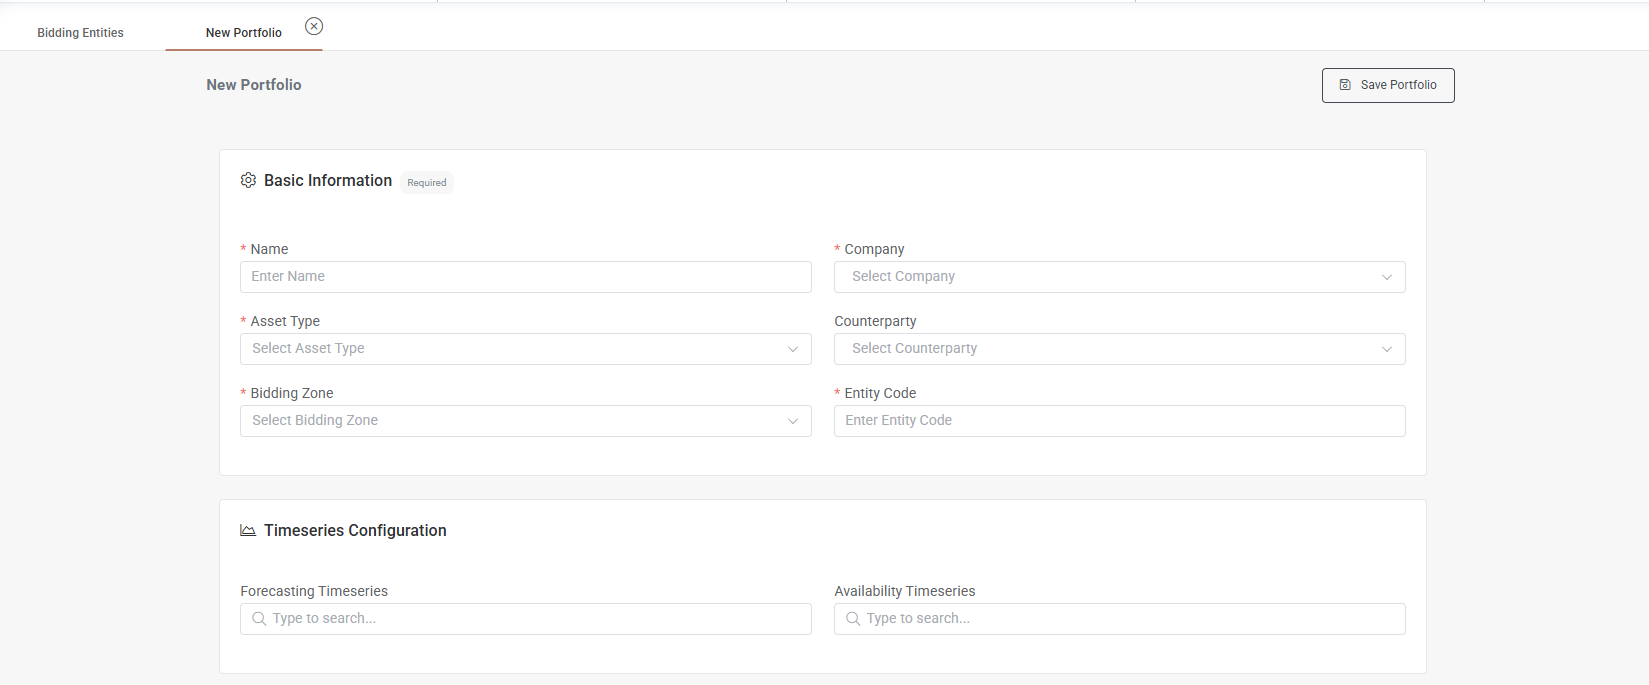
Add new portfolio
To add a new portfolio, user can click the "Add Portfolio" button on top of screen. This opens a pop-up window where several required fields must be completed:
Name: User should enter the name of the portfolio as it appears in market operator's account.
Asset Type: User should select the type of assets that the portfolio contains.
Bidding Zone: Geographic market zone for bidding (e.g. Greece, Cyprus).
Company: User can select the company that owns the portfolio (only companies that are registered in portfolio structure are available for selection).
Counterparty: Refers to the company that represents the original entity in spot market transactions. The user can select any company registered in the "Back Office > Companies" module to act as the representative counterparty.
Entity Code: The EIC code of the specific portfolio.
Forecasting Timeseries: A smart search field where users can begin typing and select the forecast timeseries relevant to the asset. From this point user can input a forecast from external sources for use in bidding (first the forecasting data series should be declared in data room).
Availability Timeseries: Like the forecasting field; allows linking to the appropriate availability data source.
Note: Only fields with asterisk are mandatory.
Additionally the following fields should be filled:
Capacity History: By pressing "Add Row" in "Capacity History" field user should select a valid from date (by default the today's date is selected) and the capacity (in MW) of the portfolio. Additionally, a valid to date can be selected and a minimum capacity (in MW) for the portfolio. By managing these validity periods, the system maintains a complete historical record of portfolio's capacity for traceability and compliance.
Validity History: By pressing "Add Row" in "Validity History" field user should select a valid from date (by default the today's date is selected) that the portfolio is valid as entity and optionally a valid to date.
Portfolio Assets: By pressing add assets connection a new pop-up windows shows with a search bar containing all available system's assets. By start typing the first letters system will propose you with assets. Multiple assets can be connected at once. After finishing with this step user presses accept and the assets are available in portfolio with their validity dates that can customized.
When all changes are completed user should press "Save portfolio" in the top right corner of screen.
Edit / Delete Bidding Entity
To modify a bidding entity user can do it by double clicking on it or by selecting the "pencil" icon in actions area. After changes have been made user should click on "Save" button.
The logic to terminate a bidding entity is to do it by using the valid to date field. For example by selecting a yesterday's valid to date user can terminate an asset/portfolio. The same logic applies when user wants to delete assets from portfolios by choosing a past valid to date. This happens for traceability and reporting reasons for the whole changes that have been made in bidding entities. This procedure can easily happen by pressing the "Deactivate" button in actions area.
Was this helpful?