Docs / 4. Back Office
4.4 Master Agreements
Overview of Master Agreements
Master Agreements denote the contractual relationships (contracts) between two companies (counterparties), the company of the user and any third-party. This article provides step-by-step instructions for managing Master Agreements information within the system. The system allows users to create, modify, export, and manage Master Agreements data efficiently.
Create New Master Agreements
There are two ways to register a new Master Agreement in the system:
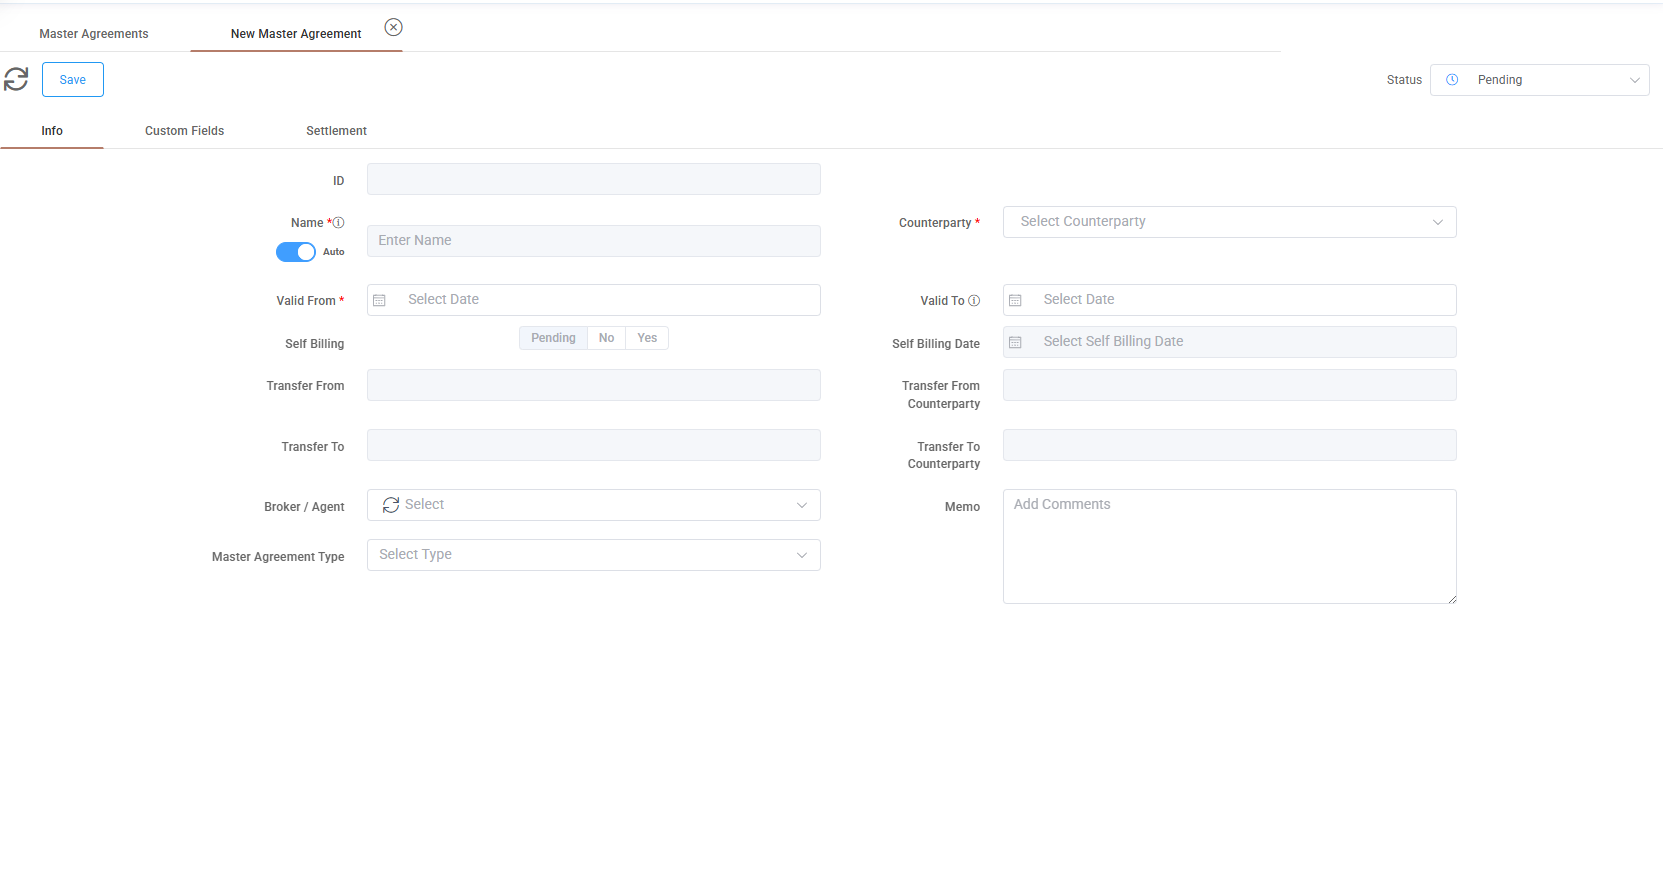
1. The user can register a new master agreement by pressing the “+” button on top of grid. Then, a new window opens where the user can insert information about the agreement, as illustrated in the figure below and press “Save” button after finishing with the data insertion.
2. The user can download the template by clicking the “Templates” button on top of grid and selecting "Download Template". An excel file gets downloaded in user's system where user should fill in the corresponding data. Then, the user should click the “Import Template” button (from the same button) to upload the excel file and finalize the insertion by clicking the “Save” button, as illustrated in figure below. After this, a successful message appears and all the data from excel cells will be visible in platform.
When inserting a new Master Agreement the counterparty and valid from (a date picker table opens after click) fields need to be filled. Counterparty involves a list of all the existing companies in the system (the logic is that my company has a master agreement with the "counterparty" company).
Also, user may provide additional information, like:
Name - an auto-create name option is by default selected for the master agreement according to given data (counterparty, valid from). If user disables auto name option, a name should be provided by user.
Status - user can configure the status of the master agreement between the available options (pending, in progress, active, terminated) that is located in the top right corner. By default is set at pending status during master agreement creation.
Valid To - master agreement expiration date
Self billing - there are 3 options here (pending, no, yes). The field get triggered by the counterparty in case it has self billing option enabled at companies tab or not.
Self Billing Date - the date that the self billing invoicing starts (the field get data from the counterparty self-billing date).
Additionally there are fields in case a master agreement is transferred (transfer from, transfer to, transfer from counterparty, transfer to counterparty).
Broker/Agent - in the dropdown list there are available all the companies with registered counterparty type in system as agent or broker.
Master agreement type - user can specify the type of the agreement between the available options (dealer, electric loss allocation, GOs, IPPM, market representation, PPA). User can configure more master agreement types in Administration under the "Master Agreement Types" section.
Memo - optionally you can add a relevant description that accompanies the master agreement
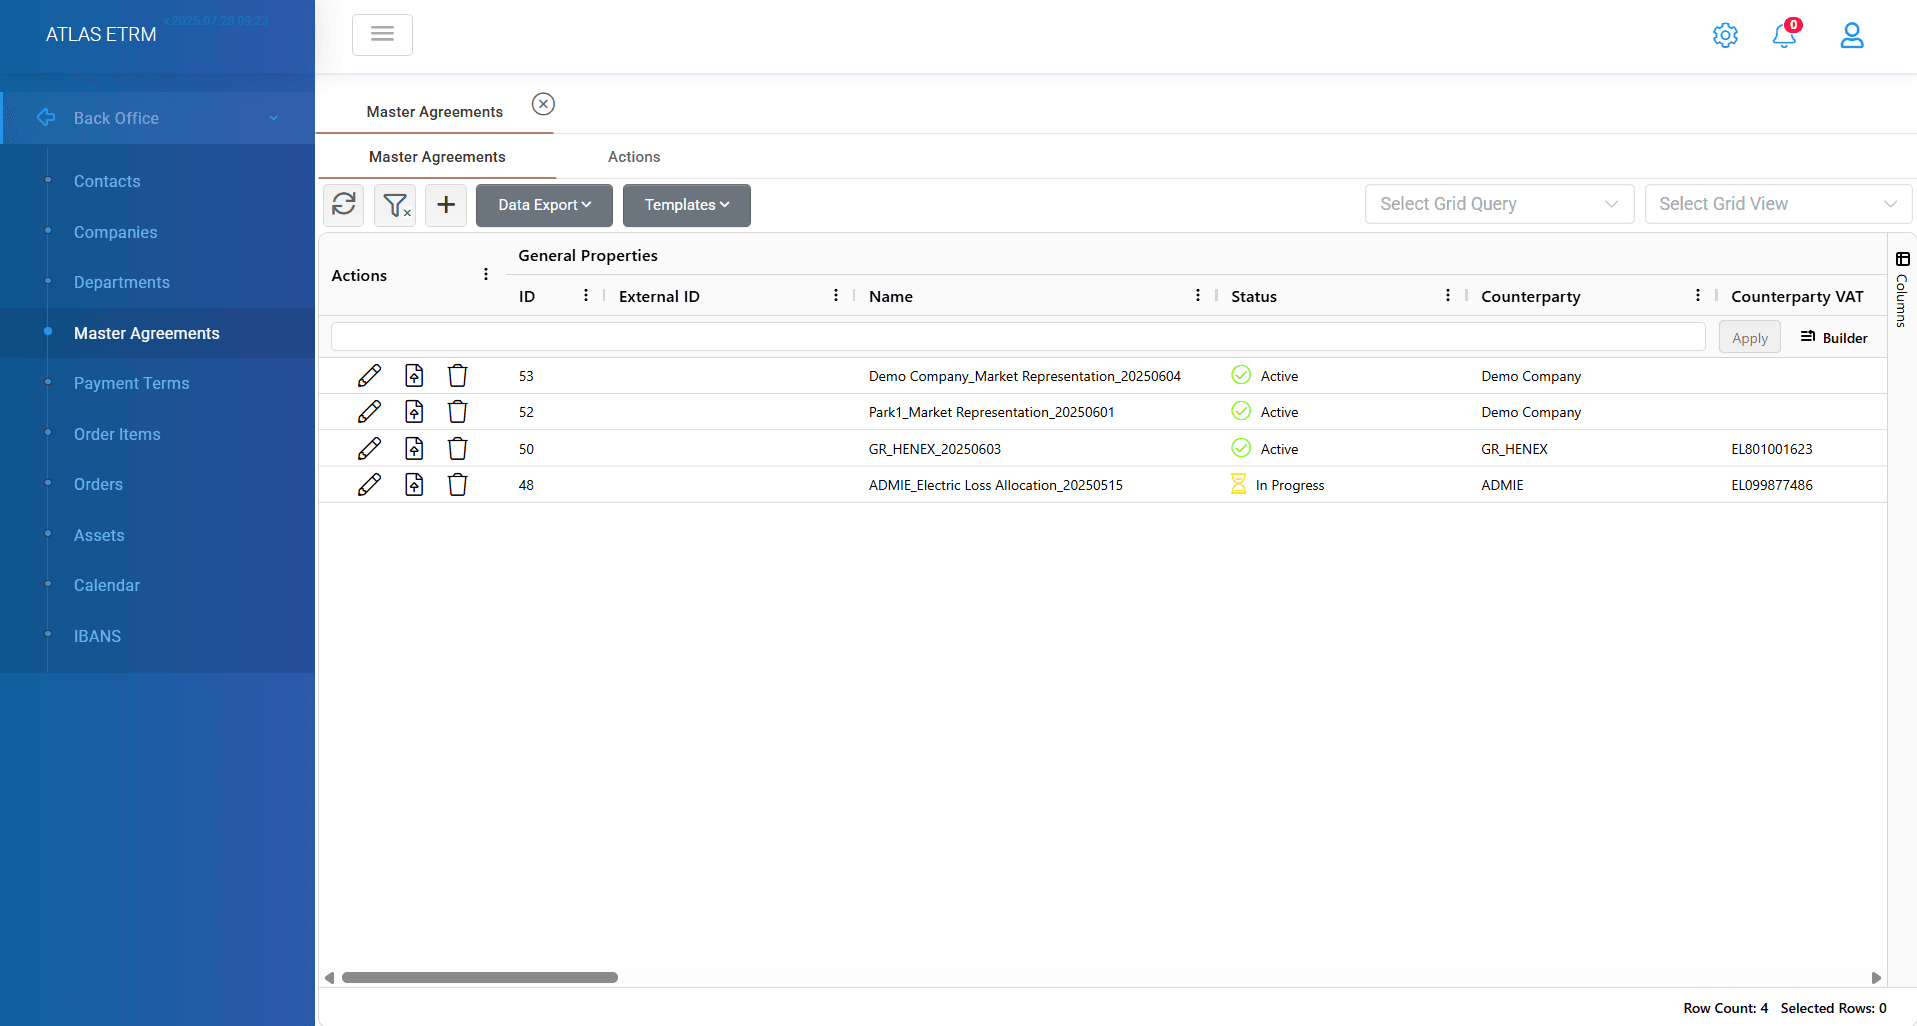
View/Edit/Delete an existing Master Agreement
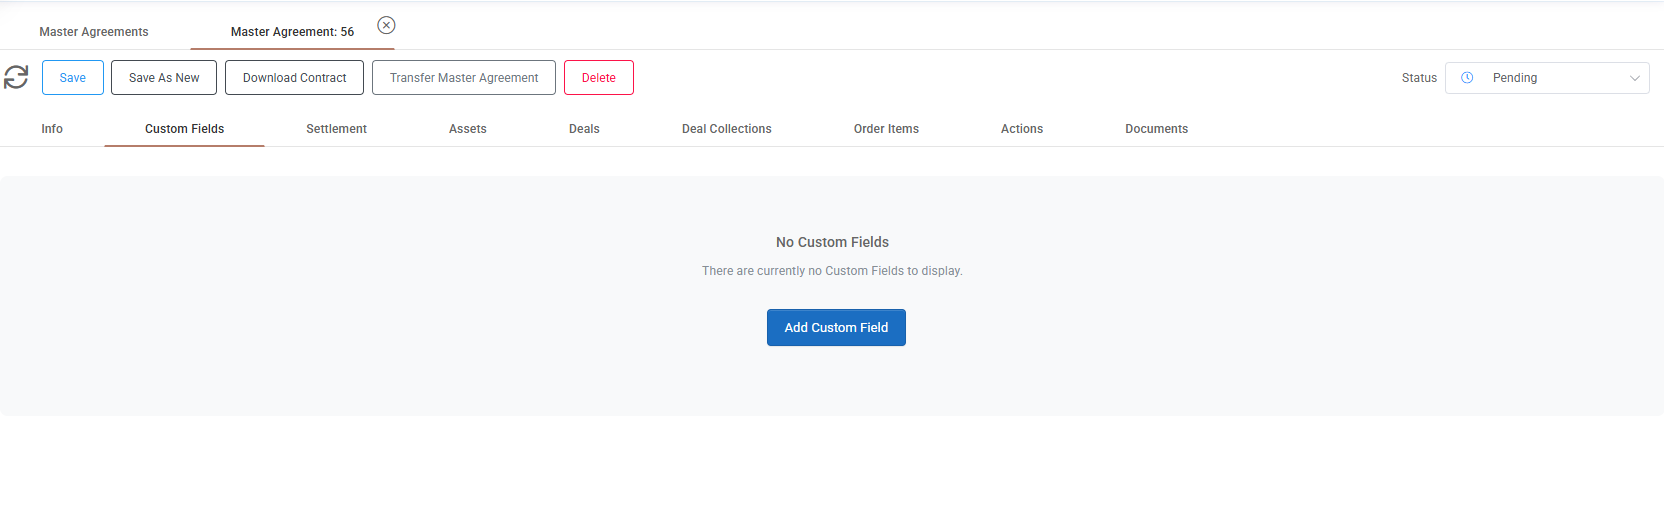
In addition to the basic information, when double clicking a master agreement from the list (or by :pencil" icon in action's area), the user can view and modify its details, create custom fields tailored to specific needs, manage financial settlement that accompanies the master agreement, update linked assets, see the relevant connected deals, deal collections and order items (refer to article below) perform relevant actions and edit the list of associated documents. Specifically, the above mentioned properties are explained below:
Info: In this tab the user can view and edit the basic information of the respective Master Agreement. These details were initially provided during the Master Agreement's registration process as described above.
Custom fields: In this tab, the user can create or modify existing values of custom fields associated with the master agreement to meet specific needs. By clicking the “Add Custom Field” button as shown in figure, the user is redirected to a new window in the administration section, where a new custom field can be created (more details in the relevant section). From there, user can create specific rules and even demand a certain custom rule for a specific master agreement type during creation.
Settlement: In this tab, the user can configure the payment terms that are connected with the specific agreement. Those payment terms should first be created in the "Payment Terms" section in order to be available in the list of payment terms in master agreement. User can do the following actions:
- Choose a payment term. Then the settlement period field is automatically populated, but the user may modify it as needed.
- Decimal precision that will be used for the calculated prices
- VAT calculation options (Pre-VAT, After VAT, VAT)
- Is Balancing. Choose whether the calculation will be balancing or not.
- VAT rate in %.
- Calendar that will be used for the calculations of order items (it takes into account the different holidays and business days per country and it has role when the payment term contains business days).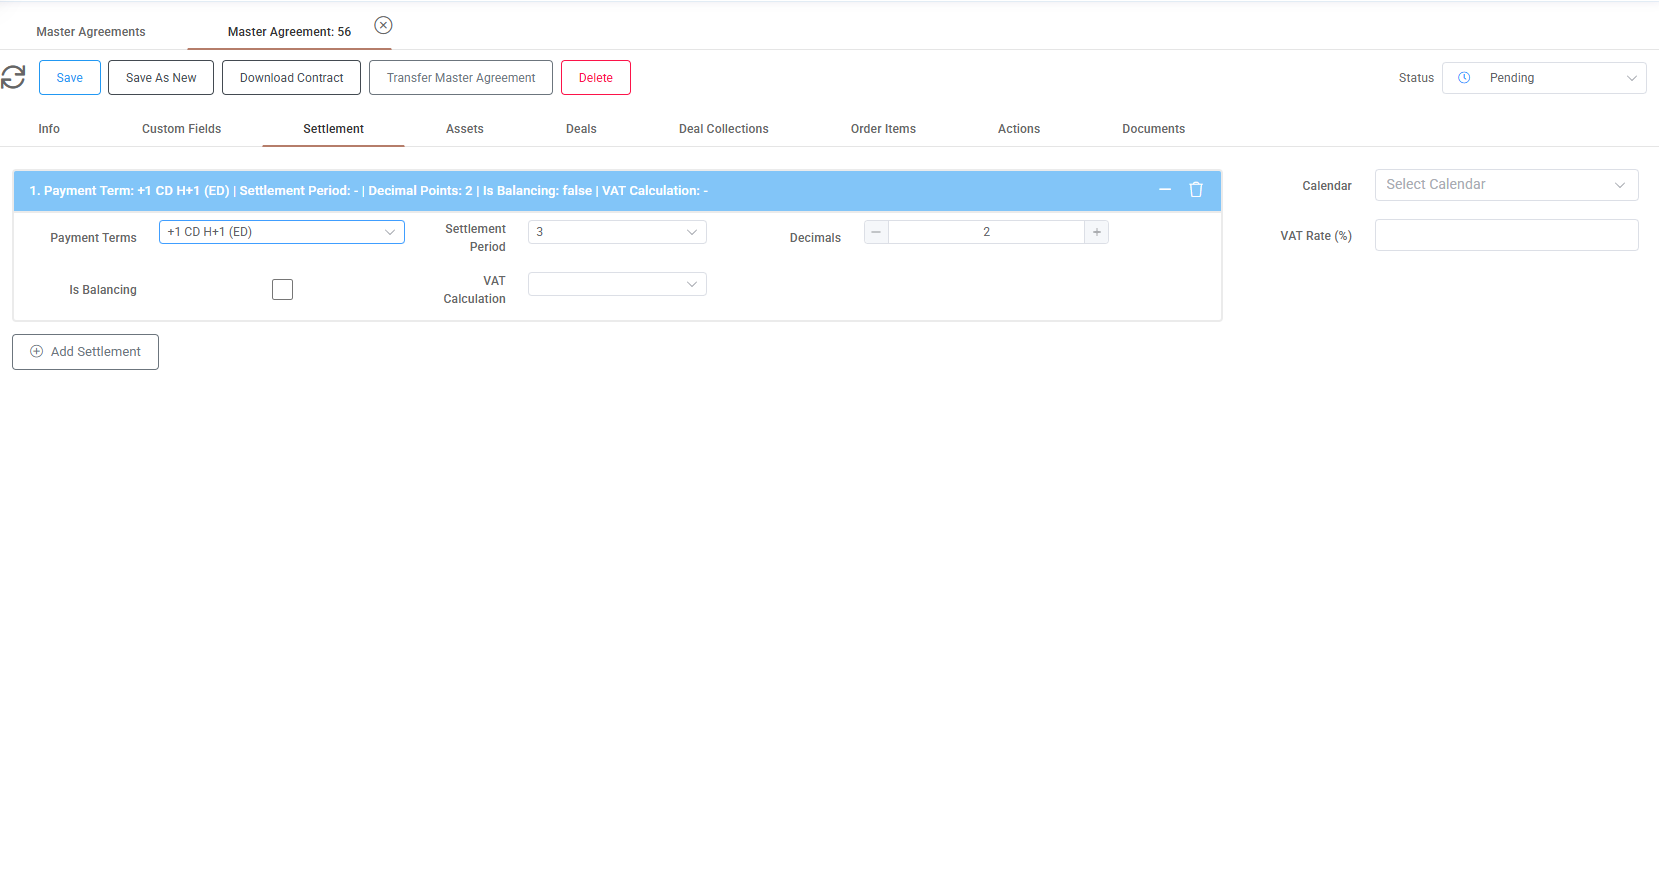
Pledges: This tab displays all pledge and pledge release records linked to that agreement. The functionality mirrors the main Pledges screen, allowing the user to edit records (pencil icon or double-click), delete entries (trash icon or right-click menu), and manage associated documents.
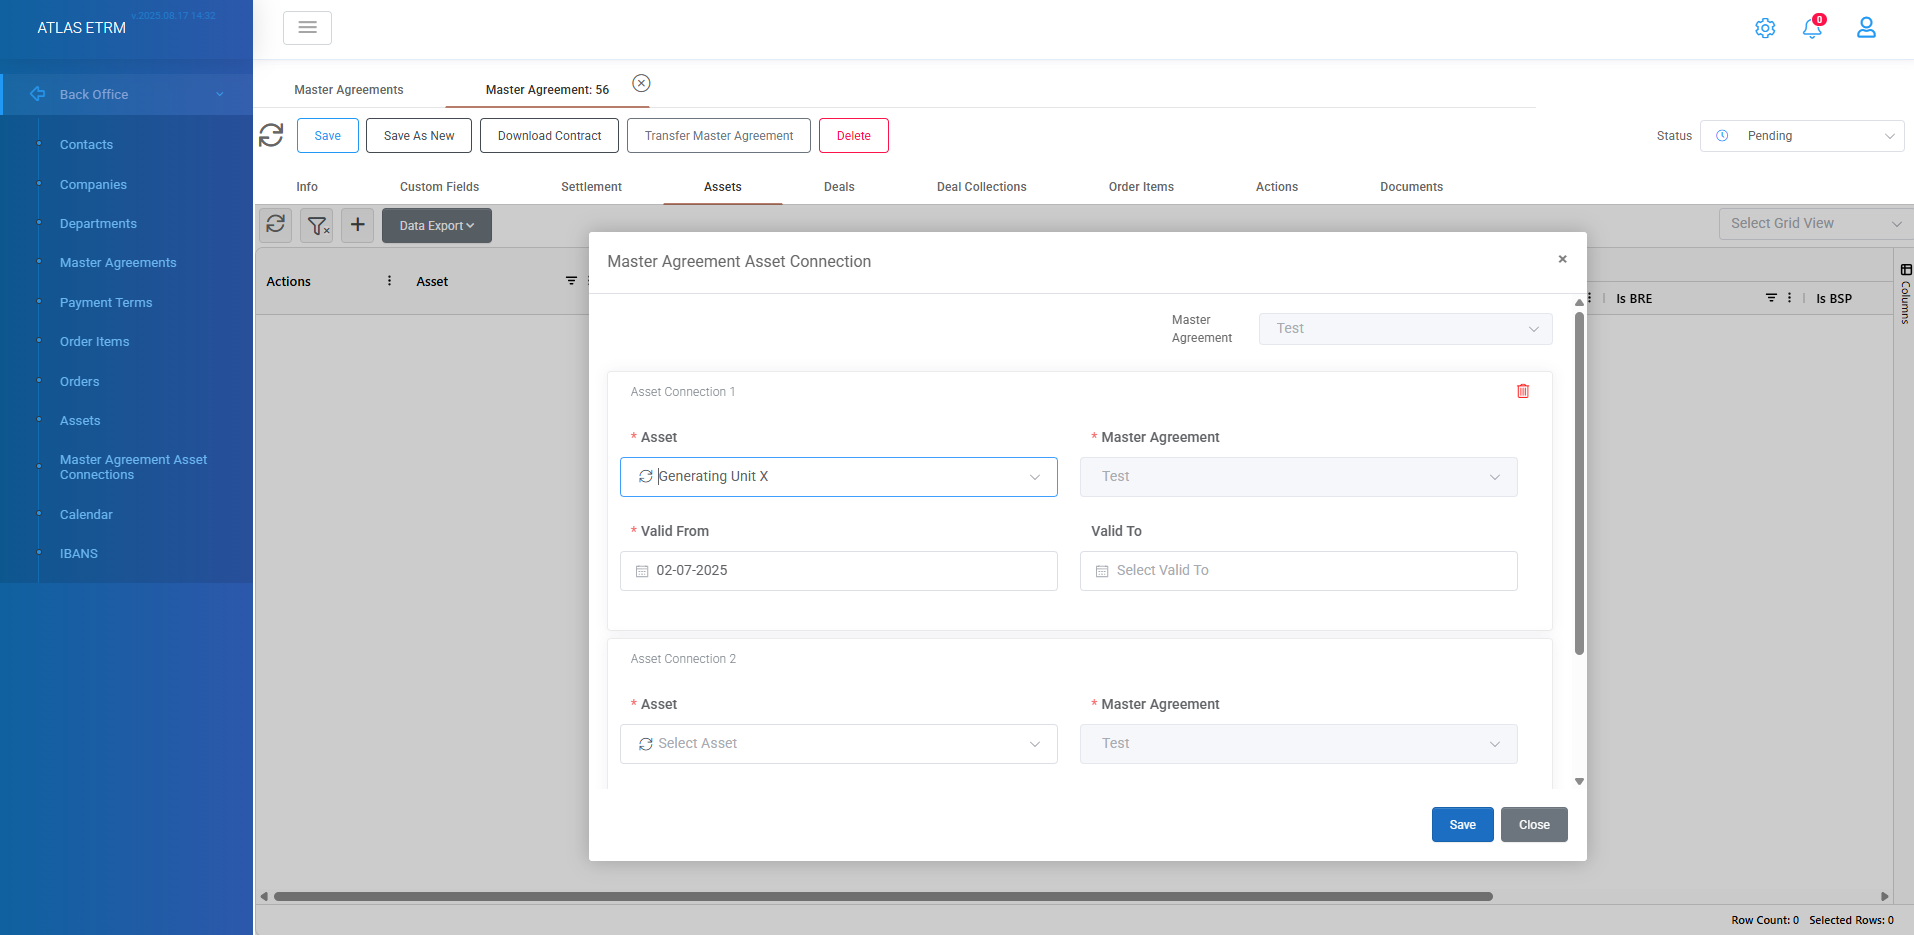
Assets: In this tab, the user can add, modify, or delete assets associated with the master agreement and define the assets validity period (as it may differ from the creation date of master agreement). To add a new asset connection user should press the "+" icon on top of grid. A new window opens where the user can add multiple assets (by pressing "Add Asset Connection") and choose the relevant assets from the list. Additionally, a validity period needs to be filled that this connection is true (at least the "Valid From" field and optionally the "Valid To" field). After the above action user should press save on bottom right of the box.
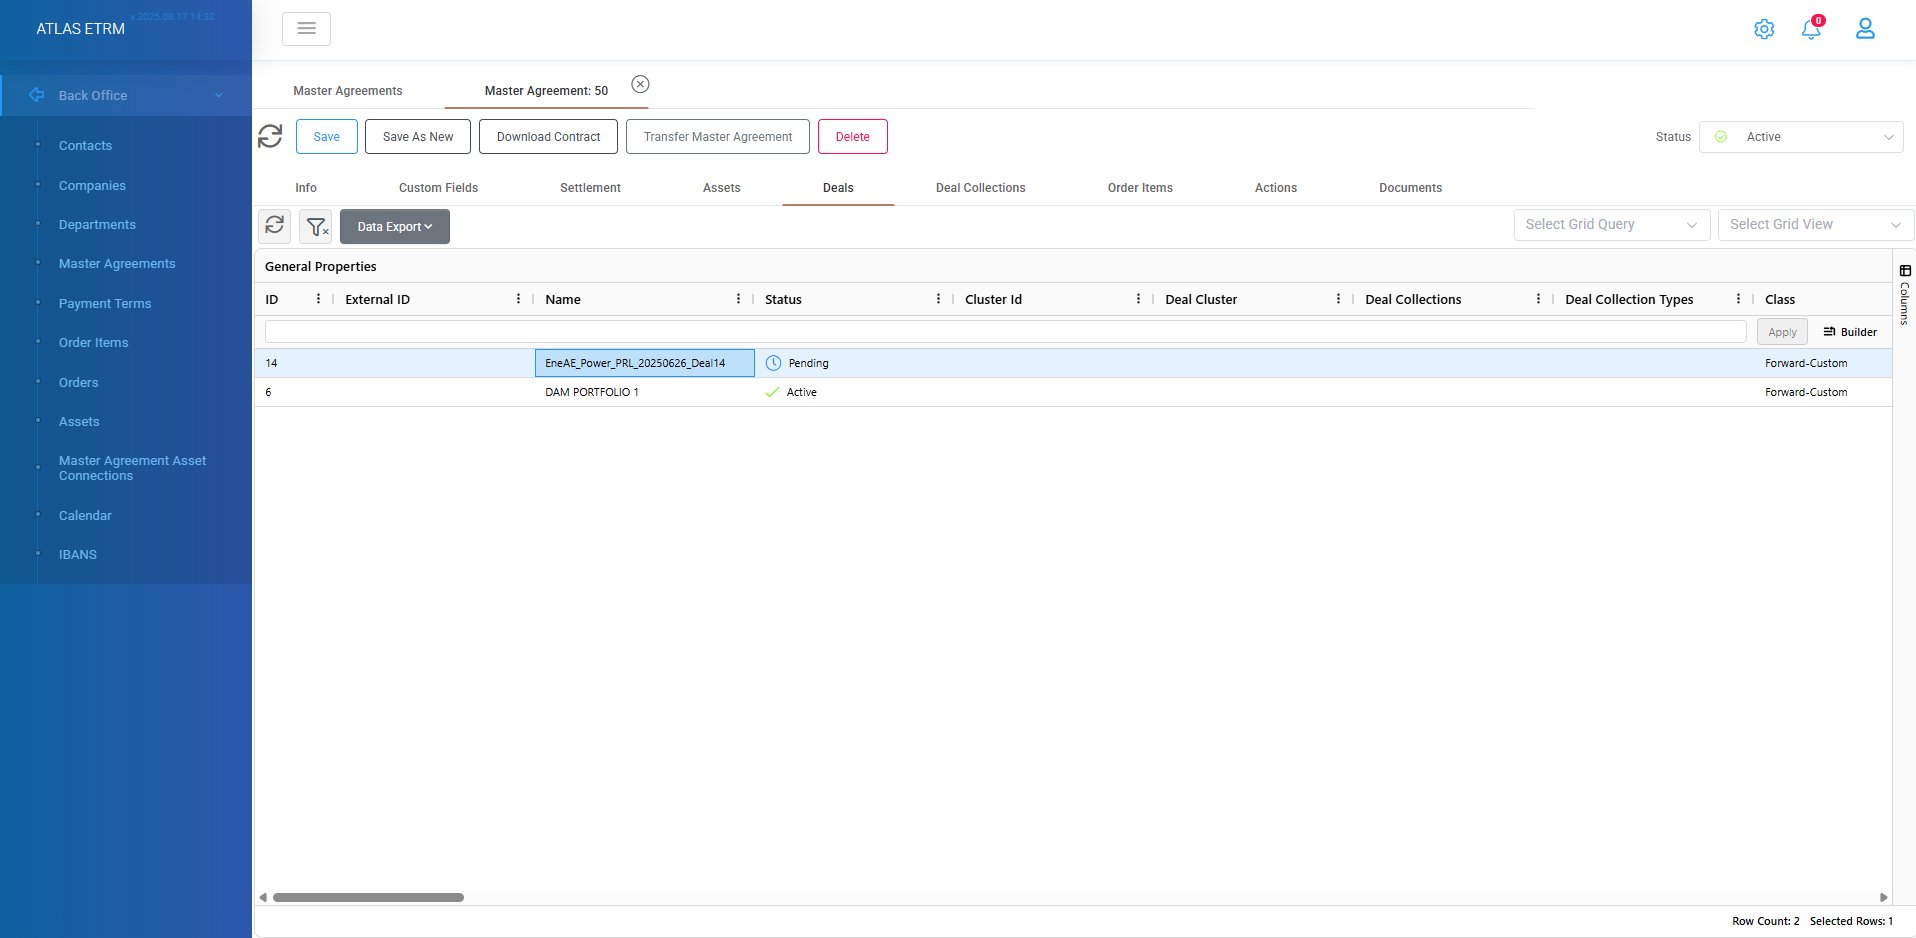
Deals and Deal Collections: In these 2 tabs users can view all the relevant deals and deal collections that are associated with the specific master agreement. By right clicking on a deal or deal collection in this tab, user may perform certain actions. Important thing is that the association should be made inside deals to be visible in these tabs.
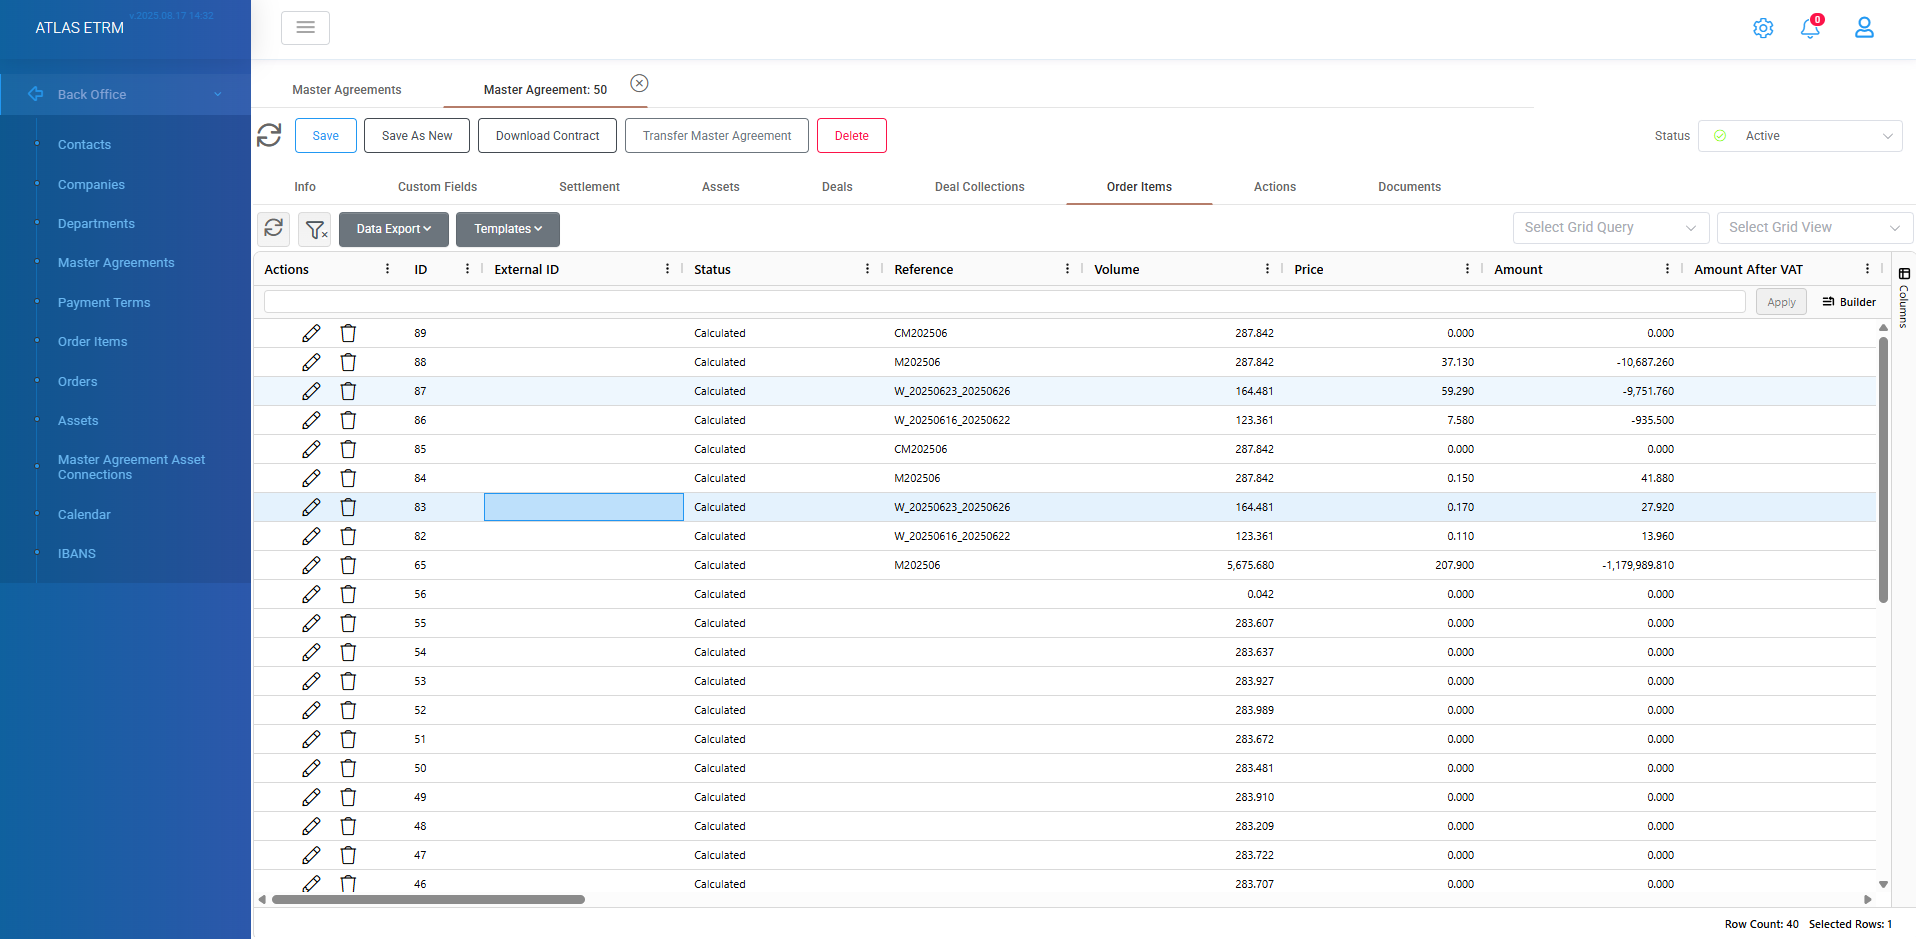
Order Items: In this tab user can view all order items that are connected with the specific master agreement and perform certain actions on them by right clicking. These order items are produced from the relevant deals that have been linked with the specific master agreement.
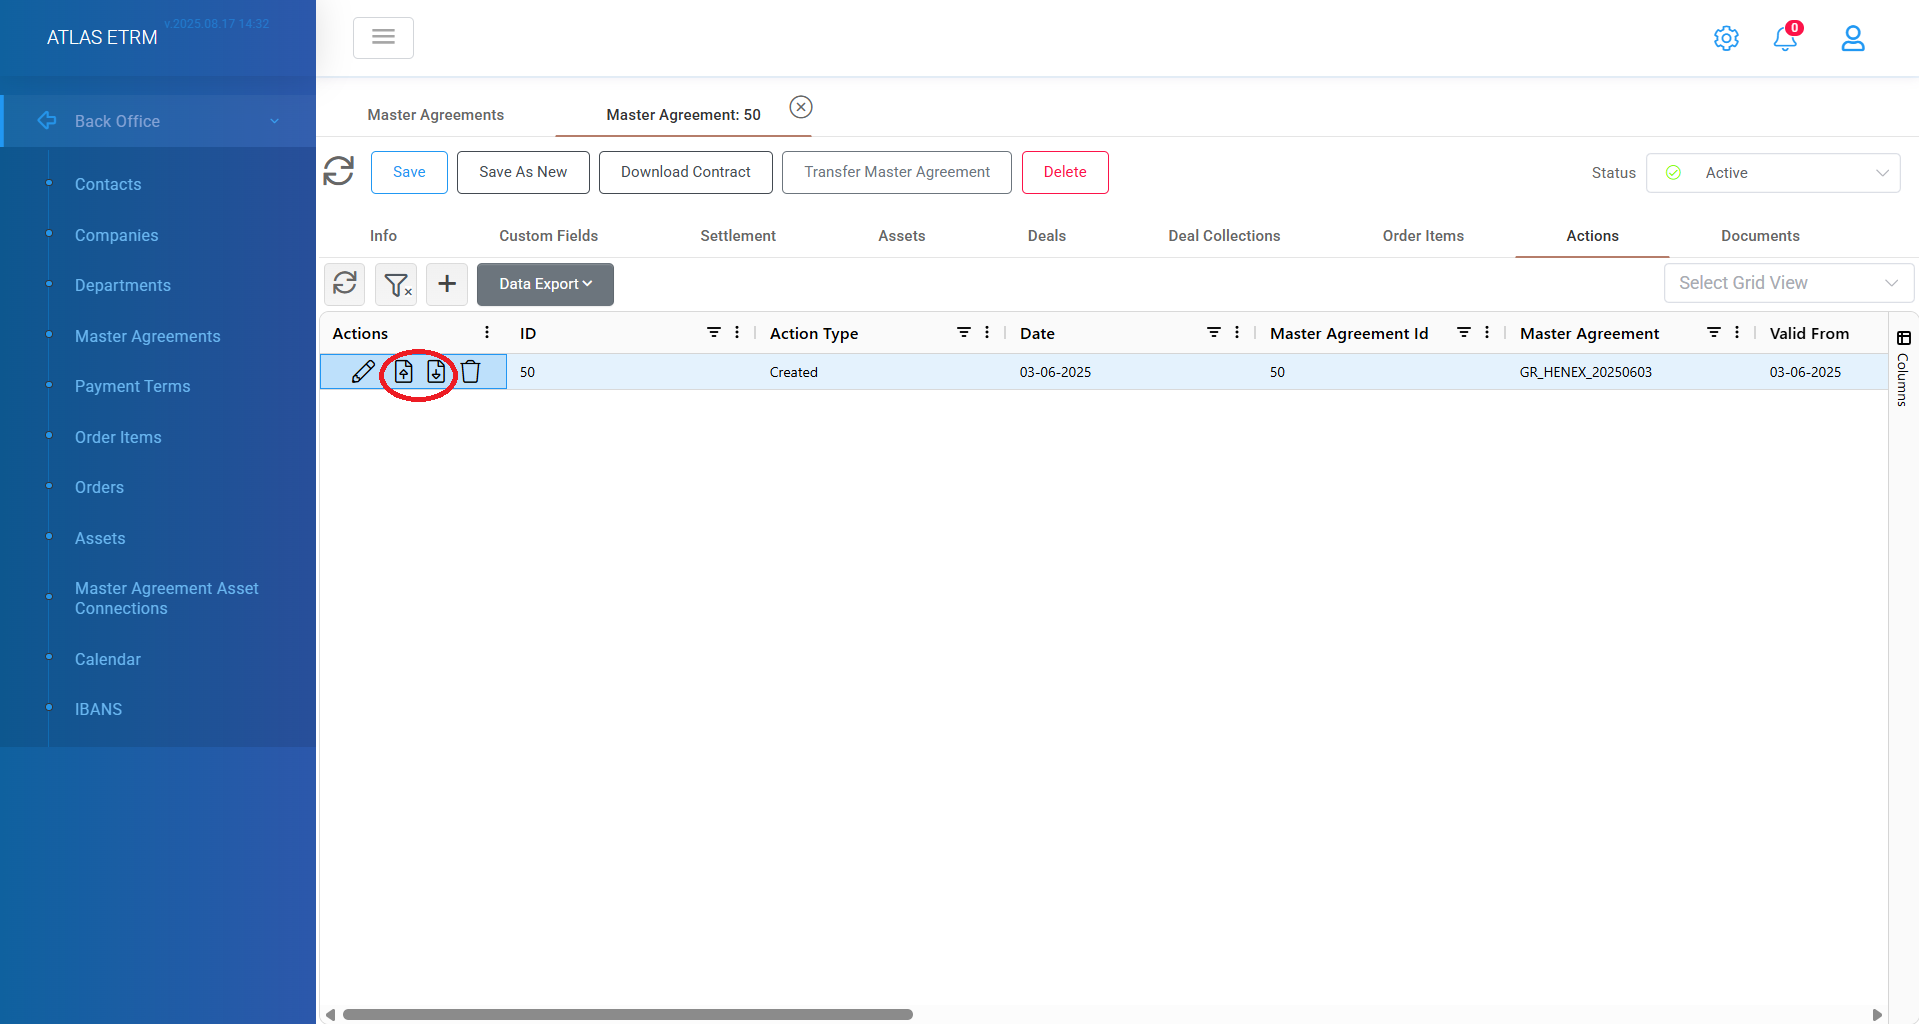
Actions: In the Actions tab, all actions associated with the selected Master Agreement — such as Created, Merged, Terminated, and Transferred — are listed in chronological order. More actions can be configured in the Administration section (refer to relevant article below in Administration).
For each action, the user can:
View detailed information.
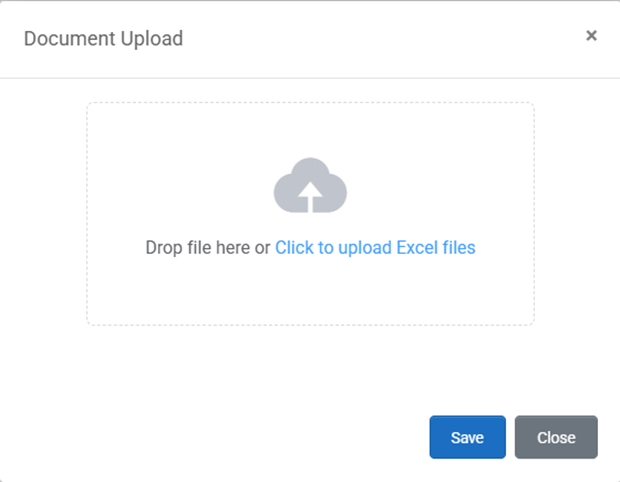
Upload or download relevant documents using the corresponding buttons in the action’s area (see circled buttons below).
Create a new action by clicking the “+” button.
Edit or delete existing actions by double clicking on an action through the pop-up window that appears.
When creating a new action, the user can define the type of action (from a predefined list or custom type) and the date the action took place.
This functionality provides a complete, auditable action history for each Master Agreement.
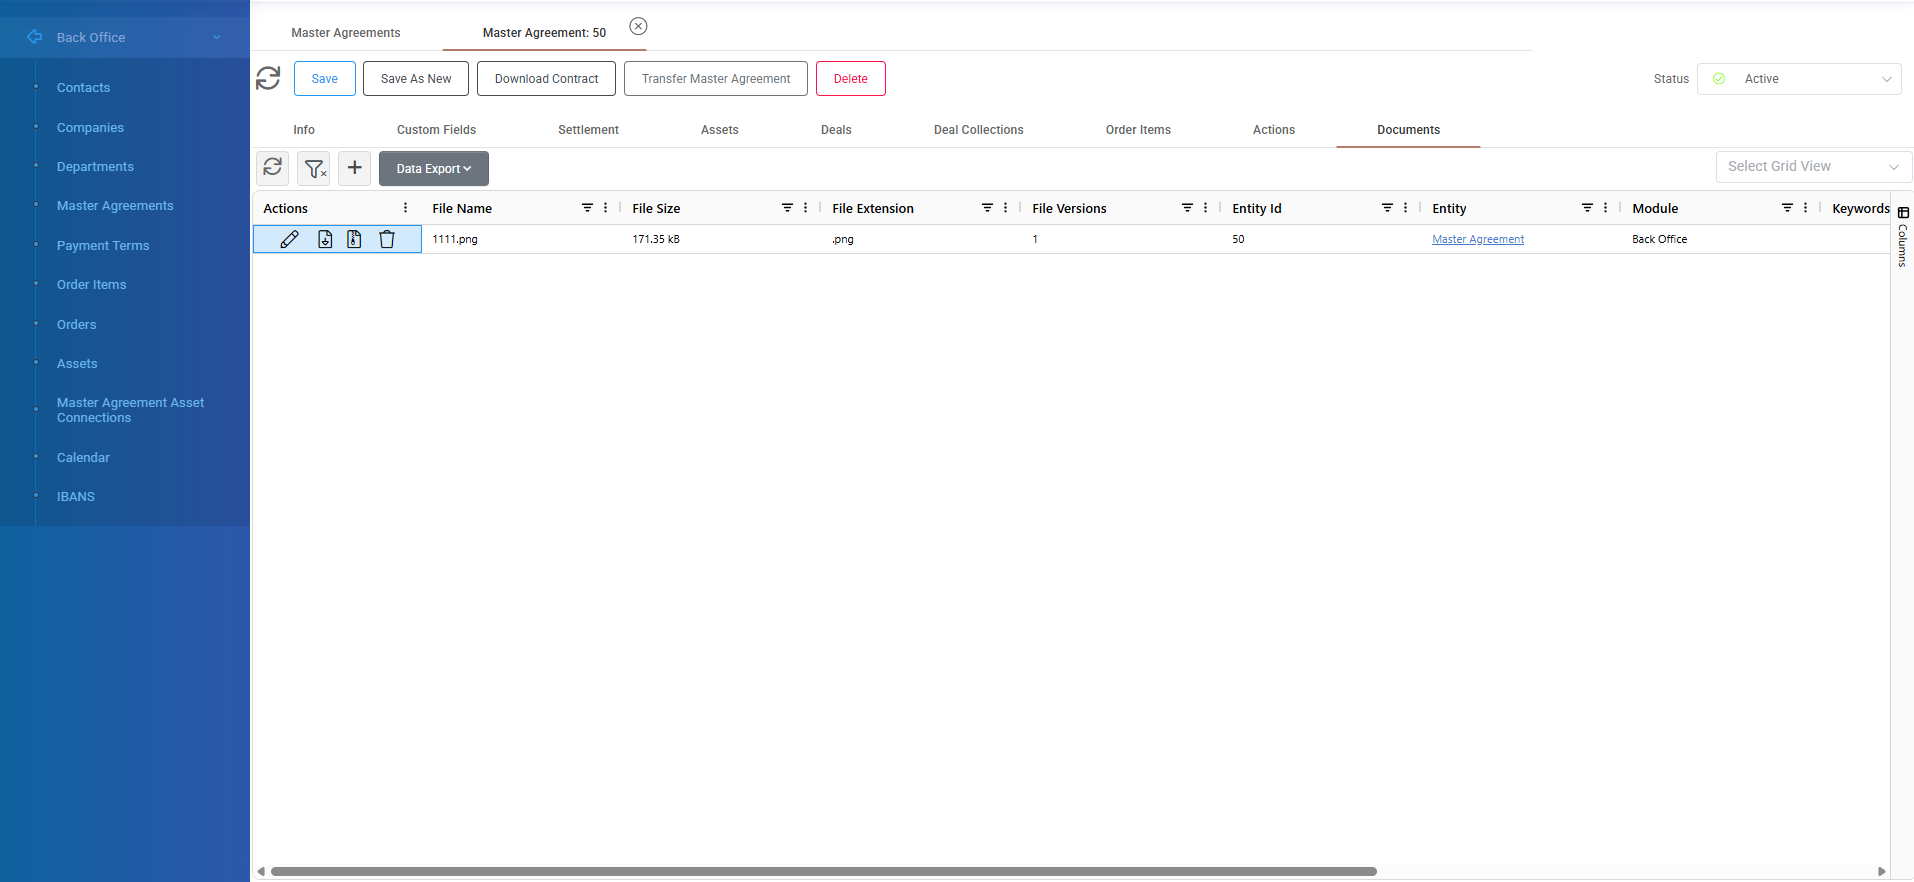
Documents: In this tab, users can create, view, edit, download, and export to Excel the documents associated with a specific Master Agreement.
To upload a new document click the “+” icon at the top of the grid. A pop-up window will appear where the user can upload a relevant file, store it in the system, and link it to the selected Master Agreement.
Additional functionality includes:
Download: Click the second icon in the Actions area to download the document to your local system.
Version Control: While editing, the user can upload a new version of the document. The system maintains a version history for traceability.
Version Selection: Use the third icon in the Actions area to select and download a specific version of the document.
Delete: The trash can icon permanently removes the document from the system.
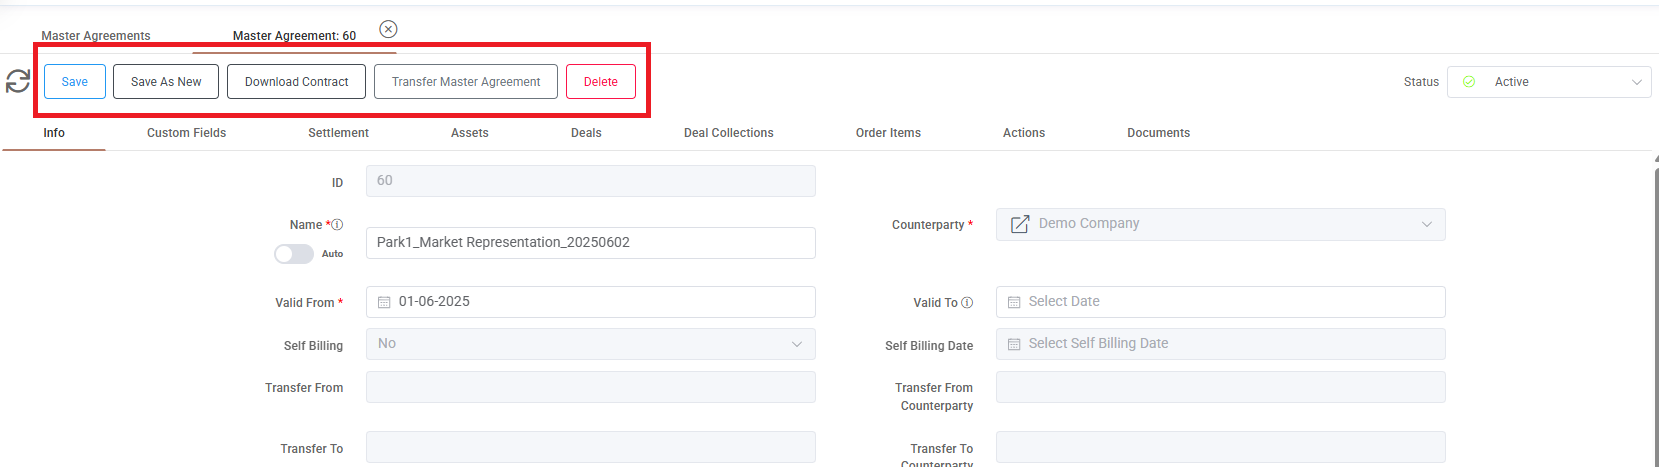
It is important to save the master agreement (from upper left side) each time a change is made in a master agreement.
Save As New
User can create easily a new master agreement from an existing one by making changes and pressing the "Save As New" button, as shown in the last figure. A successful message will appear and we will be redirected to the new master agreement.
Transfer Master Agreement
The user can initiate a Master Agreement transfer by selecting the “Transfer Master Agreement” button at the top of the page. A pop-up window opens where the user selects a new counterparty and defines “Valid From” date. A new Master Agreement is created for the selected counterparty, inheriting key attributes (e.g. master agreement type, valid to date, custom fields values, linked assets, etc) from the original one.
Delete Master Agreement
User can delete an existing master agreement by either pressing the "trash can" icon in actions area at central screen or by right click and select the delete option. Then a warning message appears that user may configure the deletion.
Update Custom Fields
Within the Master Agreements main grid, the user can select one or multiple records and perform a mass update of Custom Fields. By right-clicking and selecting “Update Custom Fields”, the system displays a selection panel with all configured Custom Fields for Master Agreements. The user chooses the field to update, specifies the value, and applies the change, which is then reflected across all selected Master Agreement records. If the selected custom field is configured as time-sliced, the user must also define the “Valid From” date for the value.
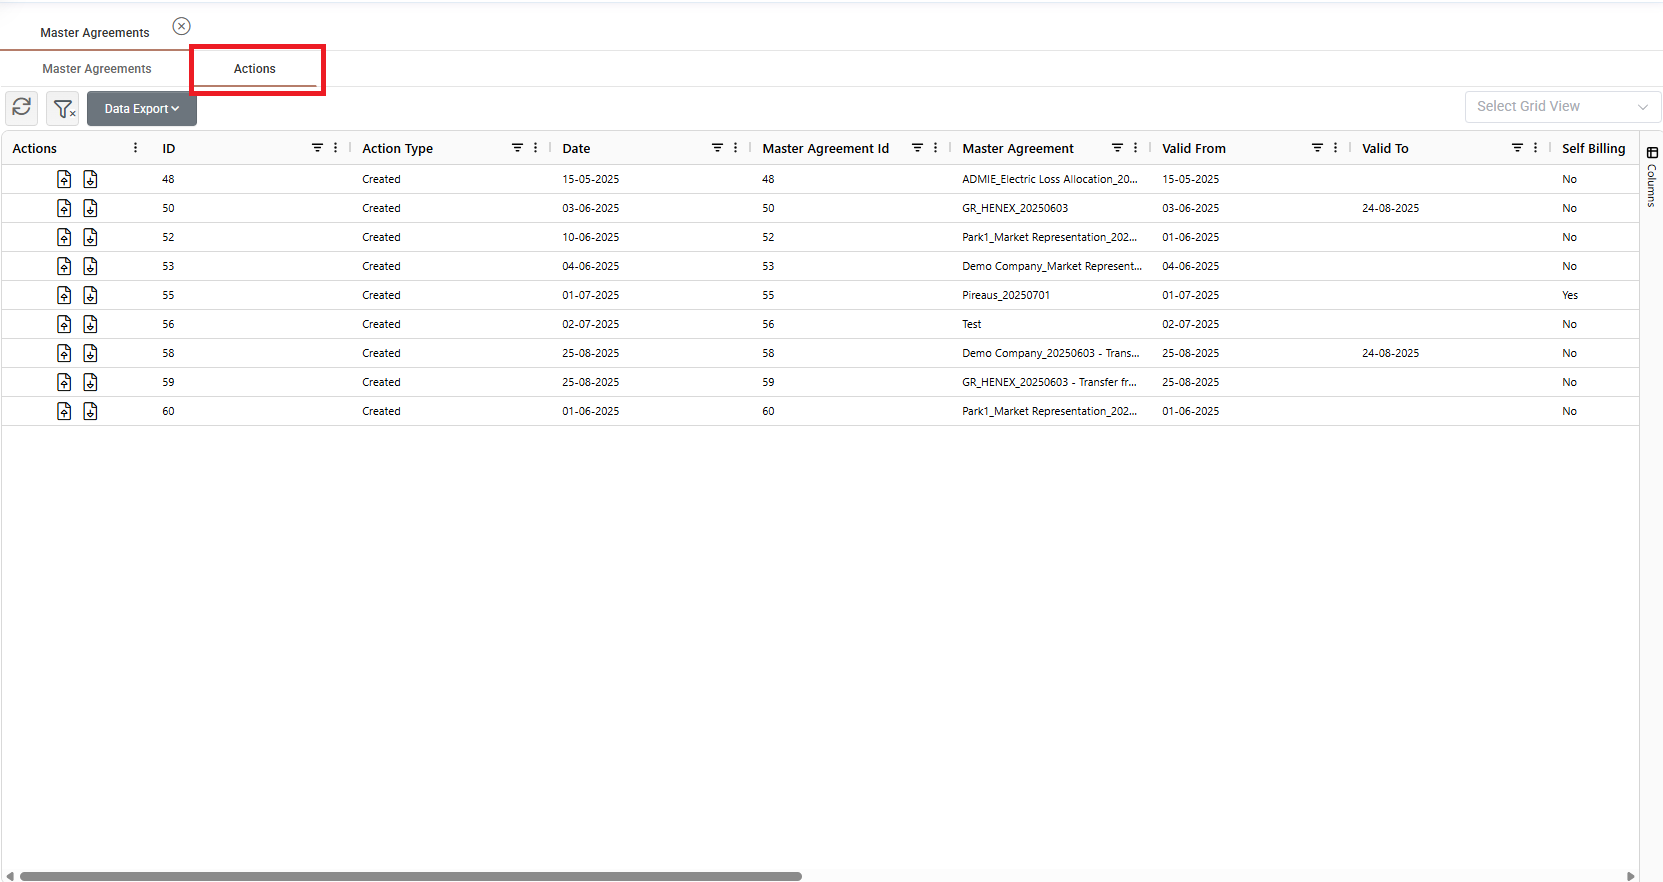
Actions Overview
There is an action overview page (as shown in the figure below) where the user can view a whole overview of the actions performed for all master agreements. From this tab user can upload/download documents from relevant buttons in action's area and delete a certain action by right clicking on it and choosing delete option.
Was this helpful?